
No keyboard, mouse, display or adapters required!
Works with Raspberry Pi 4, 3 (2 Model B and 1 Model B+), Zero and Zero W.
I'll walk you through the basic setup to get WiFi and SSH up and running as well as securing your Pi installation.
Grocery List
- Raspberry Pi
- 8Gb+ MicroSD Card
- Card Reader
- Internet
Let's get started.
Flashing Raspbian Stretch
Start by downloading the latest os from Raspbian Lite. Select RASPBIAN STRETCH LITE.
To flash the image we will use Etcher. It's free, well done, and available for all operating systems.
Open Etcher, click "Select image" and select the raspbian .zip you just downloaded. The name will be similar to 2017-11-29-raspbian-stretch-lite.zip.
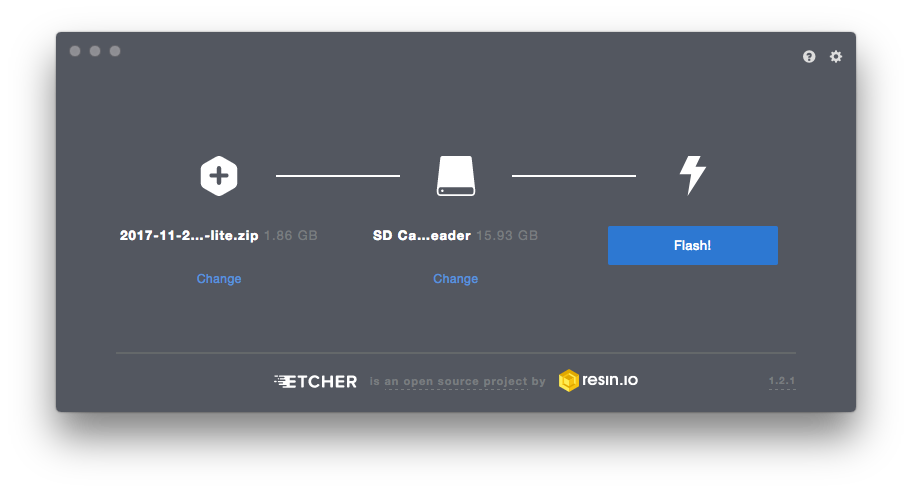
If the SD Card is connected you your computer, it will be selected automatically.
Click "Flash!", and give it a few minutes and then you're done!
Mount the SD Card
Eject the SD Card from your reader and put it back in.
At this point, you should be able to see a mounted drive called boot.
Configure WiFi (Optional, only for Pi 3 and Zero W)
If you don't want to use WiFi, skip this step. See below on how to disable WiFi and Bluetooth.
Now all we have to do to supply WiFi configuration to the Raspberry is to create a file wpa_supplicant.conf in the root of the boot drive.
I like to use Atom for this, but any editor will do.
Copy and paste the following:
country=US
ctrl_interface=DIR=/var/run/wpa_supplicant GROUP=netdev
update_config=1

network={
ssid="replace_with_your_ssid"
psk="replace_with_your_password"
key_mgmt=WPA-PSK
}
Save!
Enable SSH
To enable SSH, create an empty file ssh on the root of the boot drive. (Without dots or extensions.)
That's it!
Eject the SD card and boot up your raspberry pi! You can now SSH using the hostname (raspberrypi.local on mac, raspberrypi on windows).
$ ssh pi@raspberrypi.local
The default password is raspberry.
However, if you're using this as anything more than a development device, follow the additional steps below to secure the installation.
Disable WiFi / Bluetooth (If you're not using them.)
Open config.txt on the boot drive.
At the end of the file add the following:
dtoverlay=pi3-disable-wifi,pi3-disable-bt
You can find more options here: https://github.com/raspberrypi/firmware/blob/master/boot/overlays/README
Optimize GPU Memory-Split (If you're not using a display.)
If you don't use the HDMI or graphical features, you may want to optimize the amount of available memory.
Open config.txt on the boot drive.
At the end of the file add the following:
gpu_mem=16
16Mb is the minimum that we can force the GPU to use. This will free up at least ~50Mb of available memory.
FIX: -bash: warning: setlocale: LC_ALL: cannot change locale
If you see this error after you ssh in, you can install all the locales and it will go away. This will take a few minutes.
-bash: warning: setlocale: LC_ALL: cannot change locale (en_US.UTF-8)
-bash: warning: setlocale: LC_ALL: cannot change locale (en_US.UTF-8)
-bash: warning: setlocale: LC_ALL: cannot change locale (en_US.UTF-8)
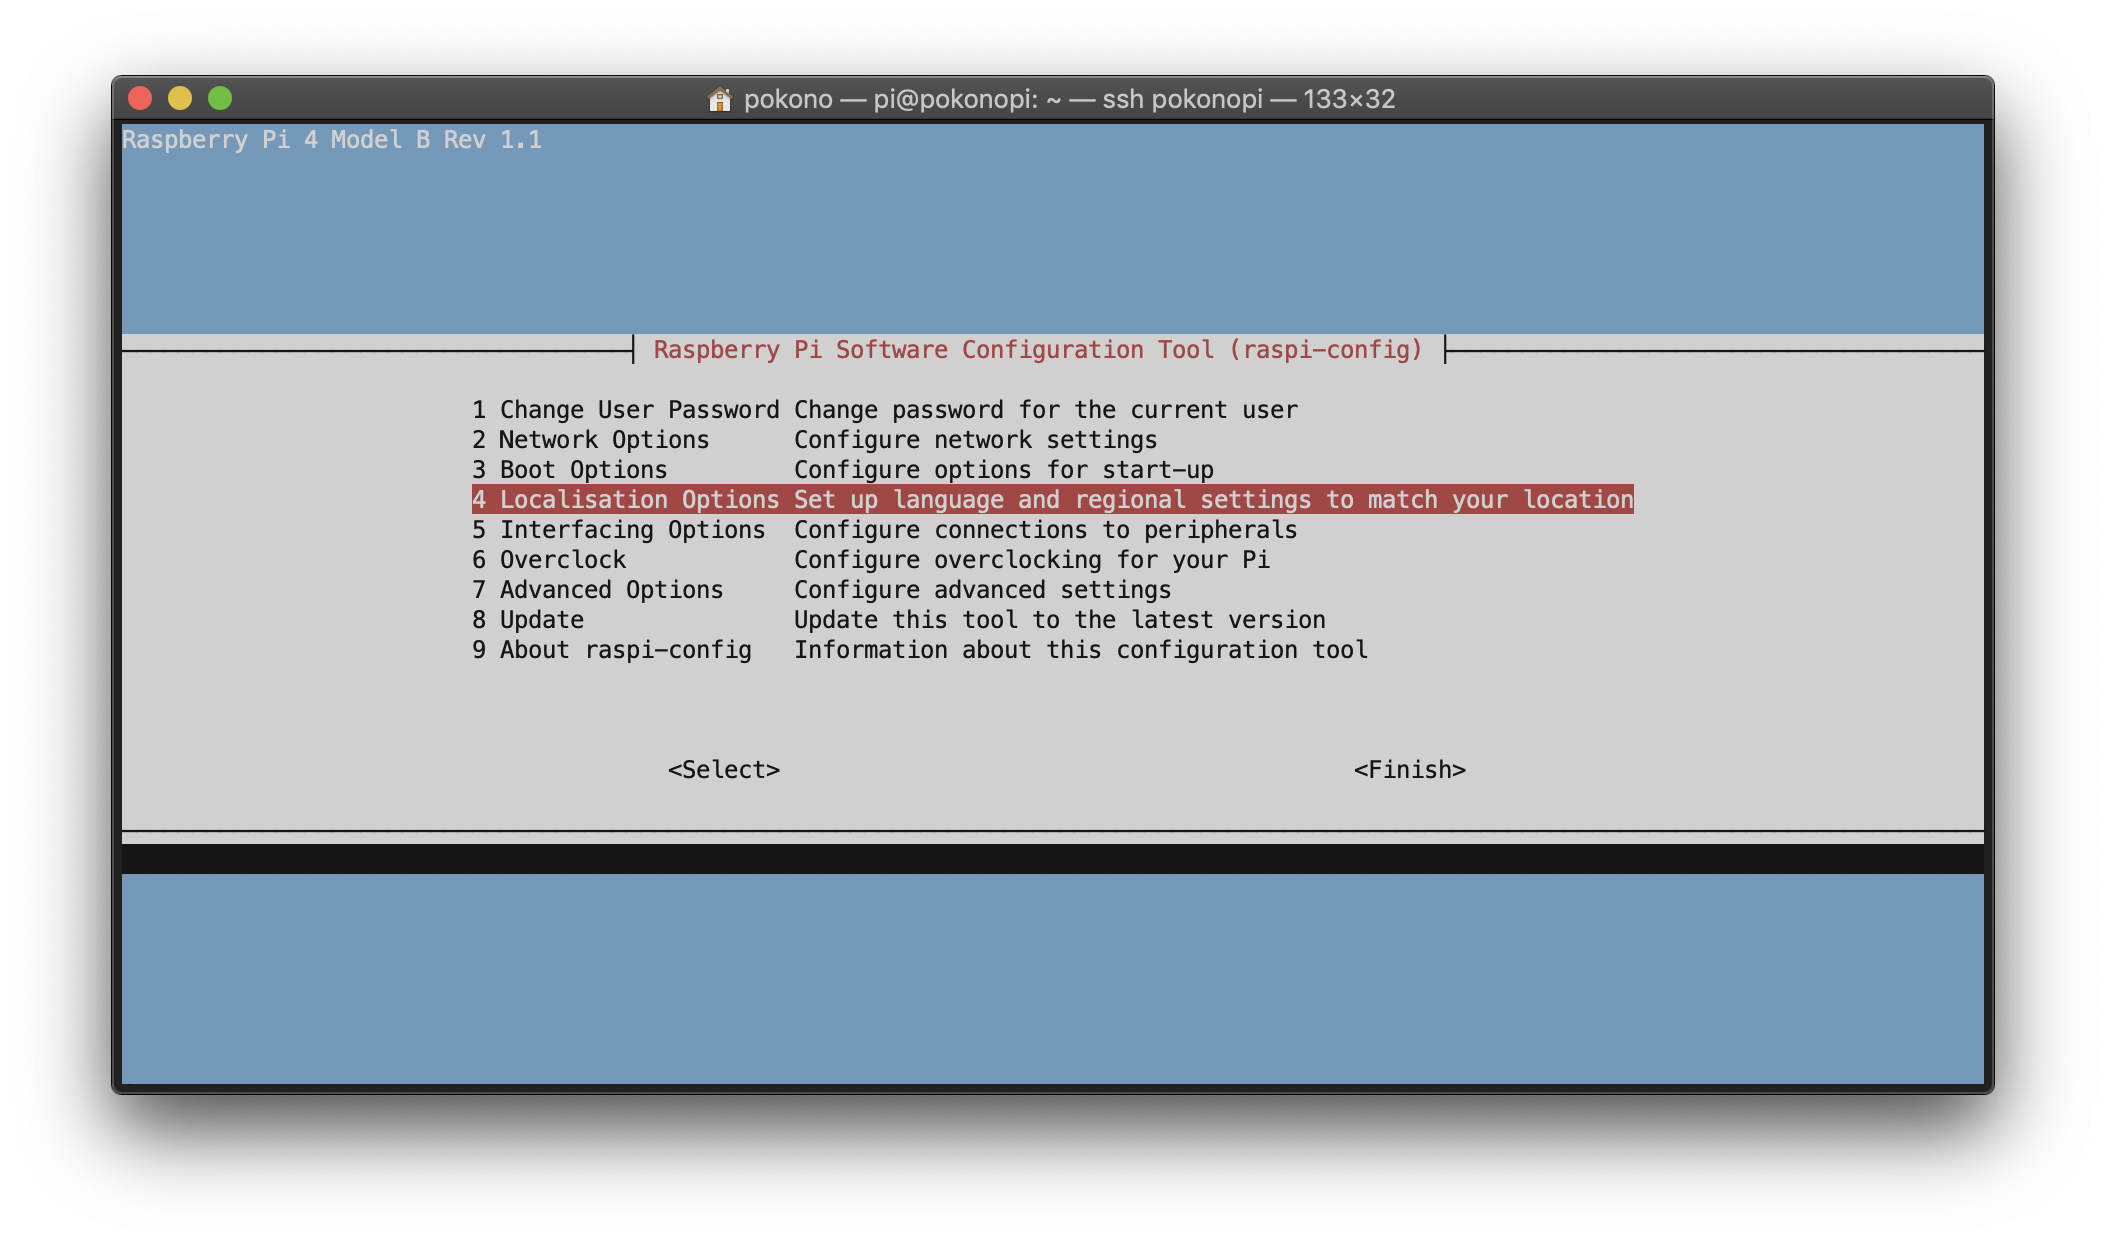
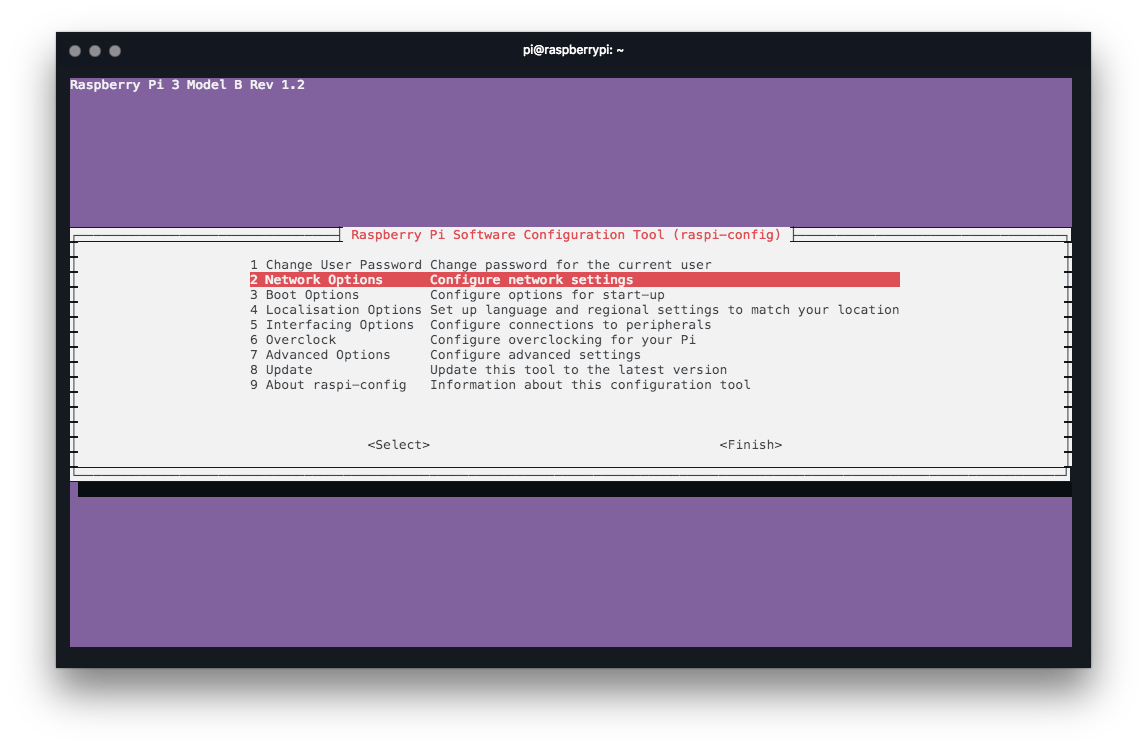
Type $ sudo raspi-config and follow the instructions in the screenshots below. (Choices are highlighted in orange.)

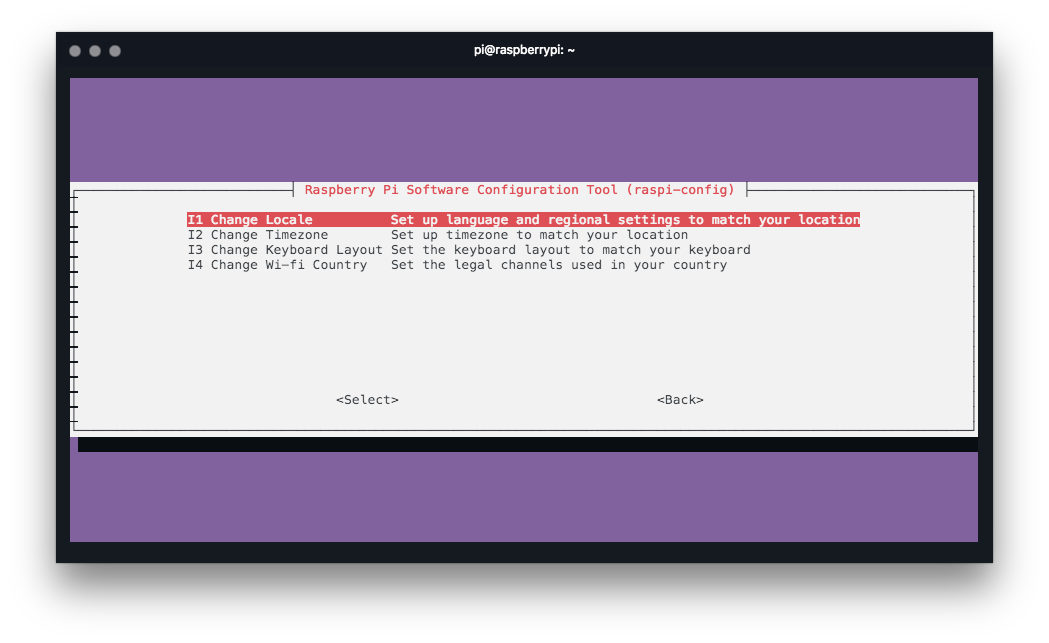
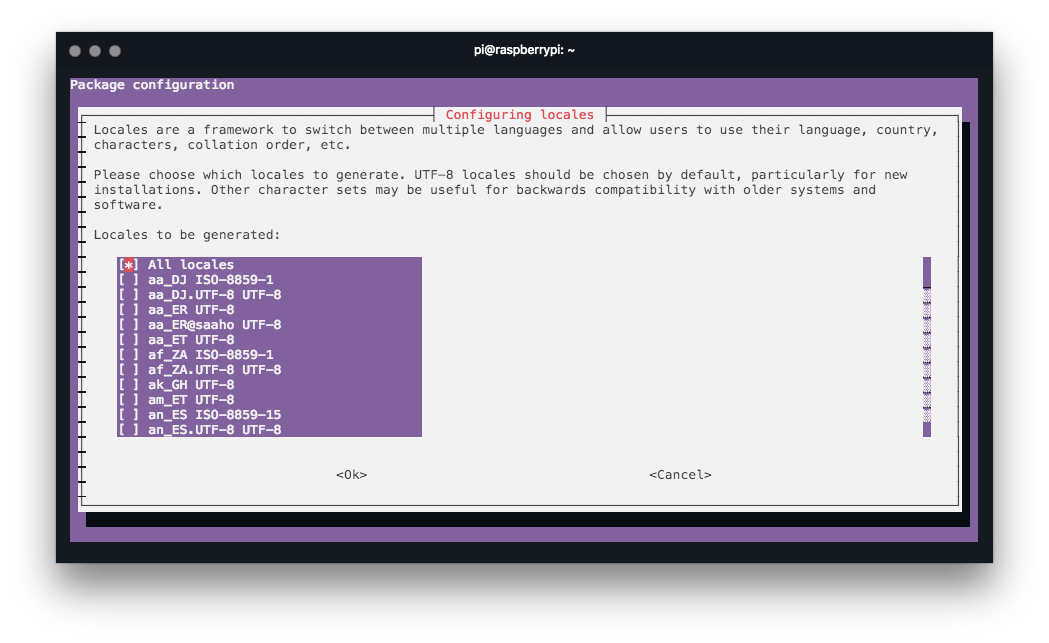
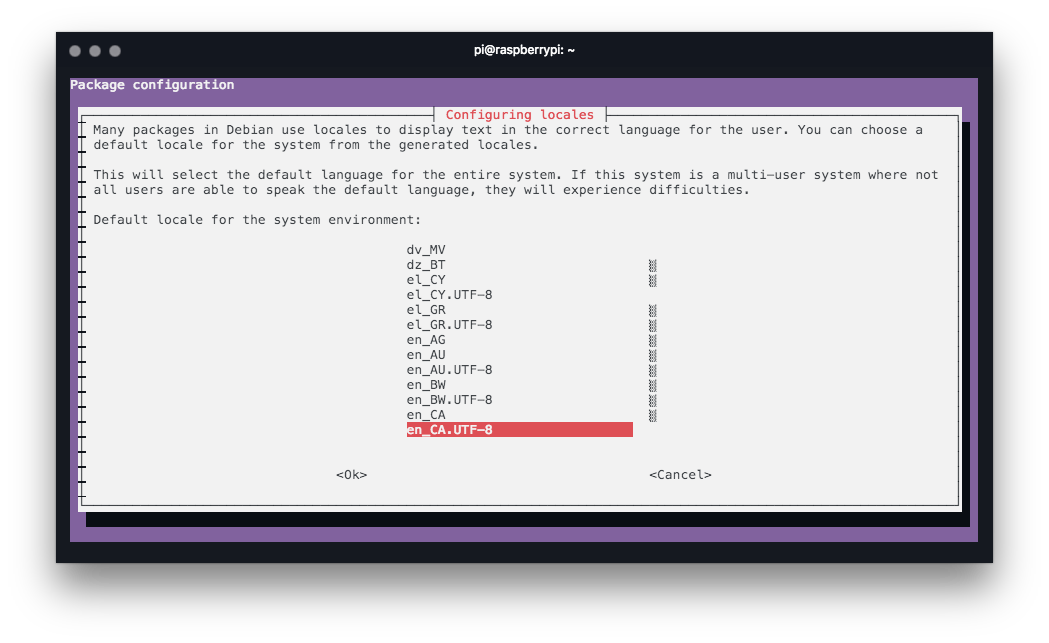
Press okay and let it run until it is done.
UPDATE: If you want, you can install only en_US.UTF-8, that's the one that is needed.
Change timezone
Type $ sudo raspi-config and follow the instructions in the screenshots below. (Choices are highlighted in orange, the last step if to select your timezone.)
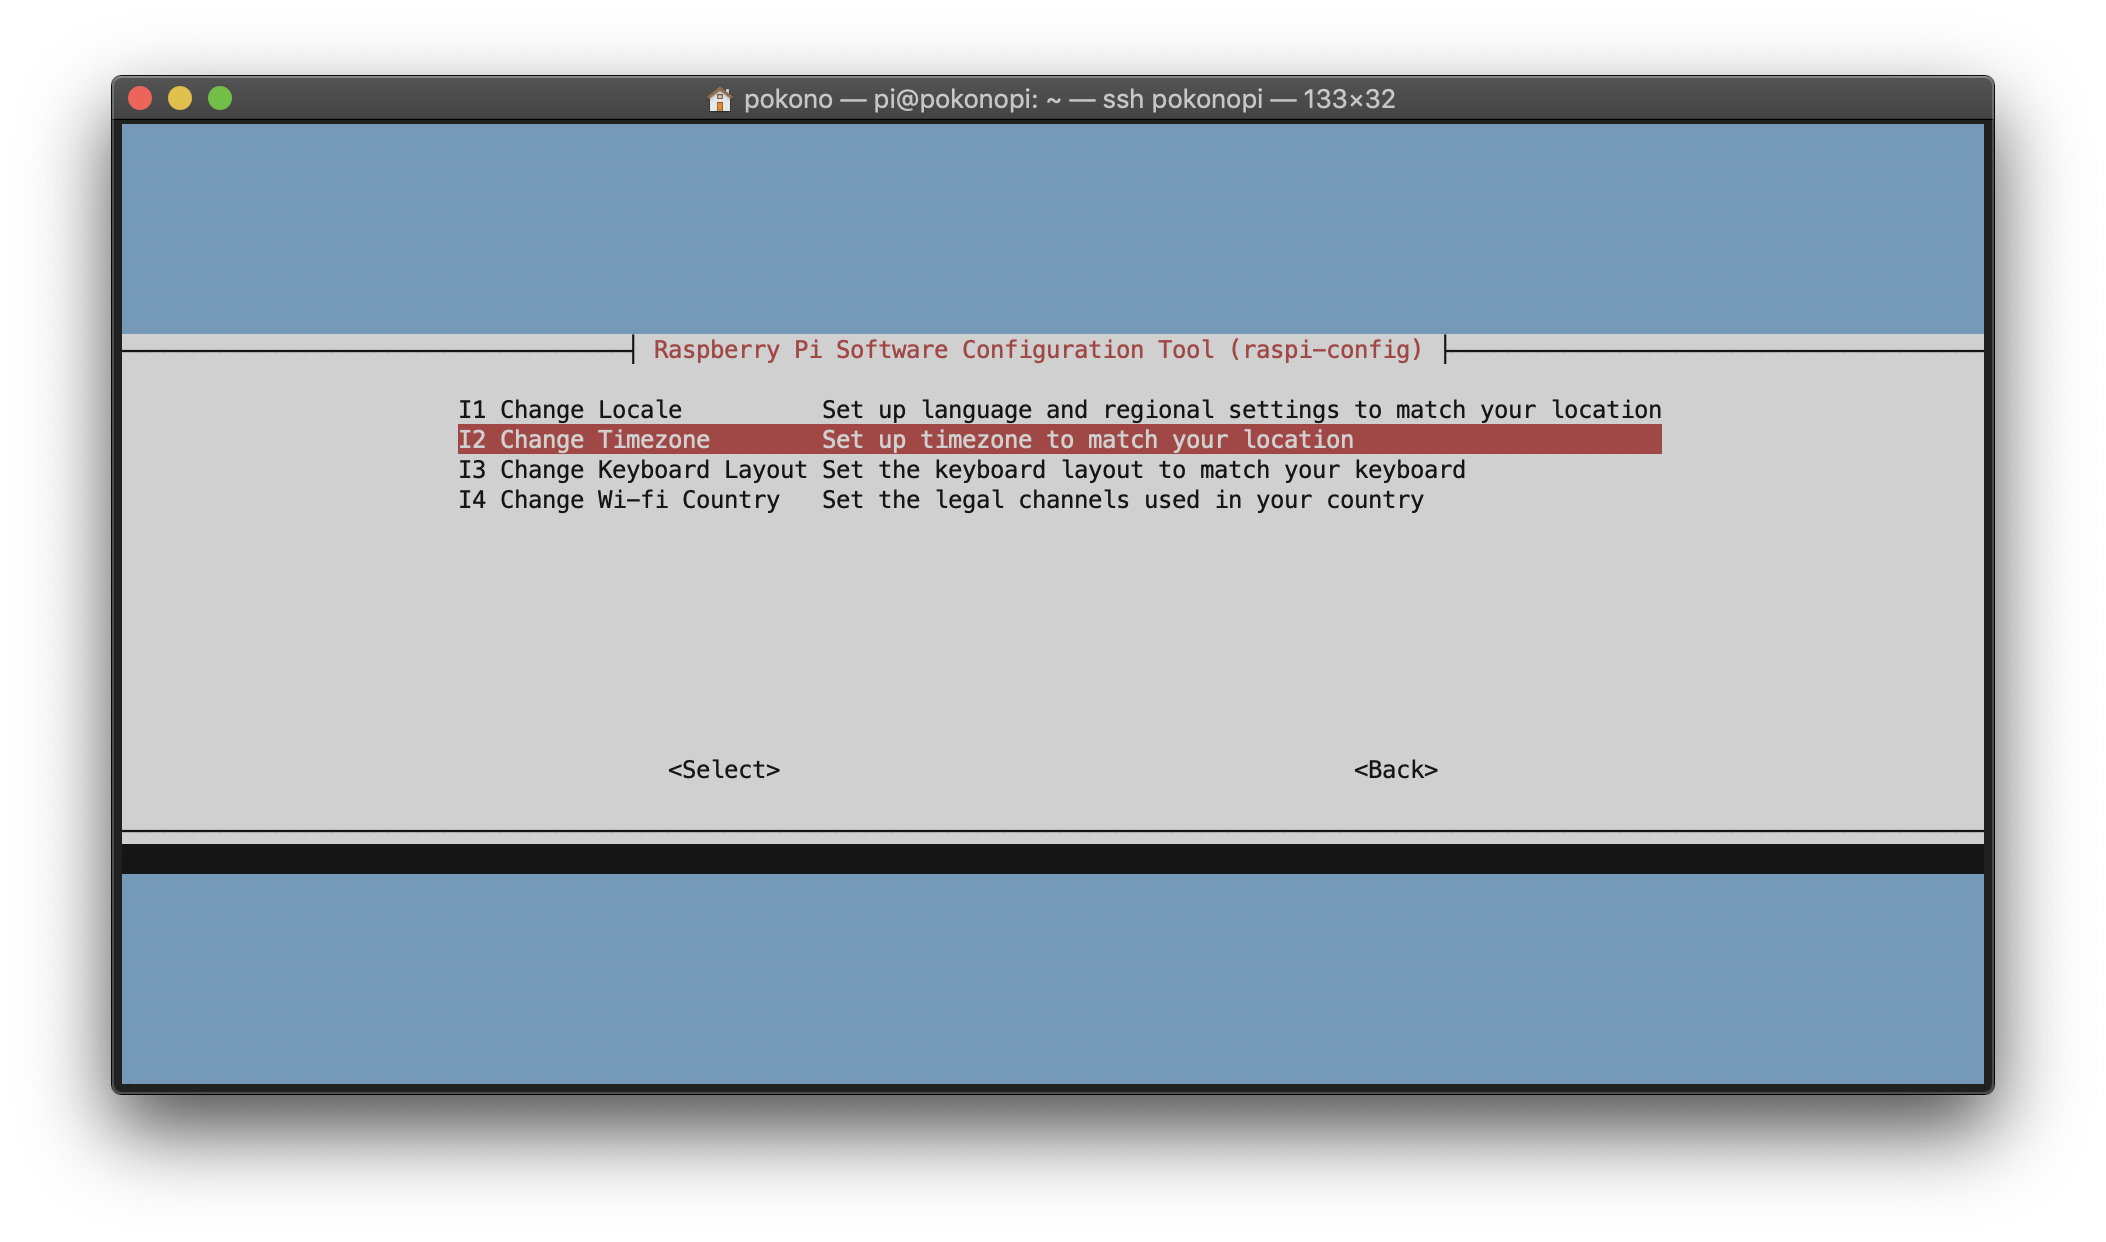
Press okay and we're done!
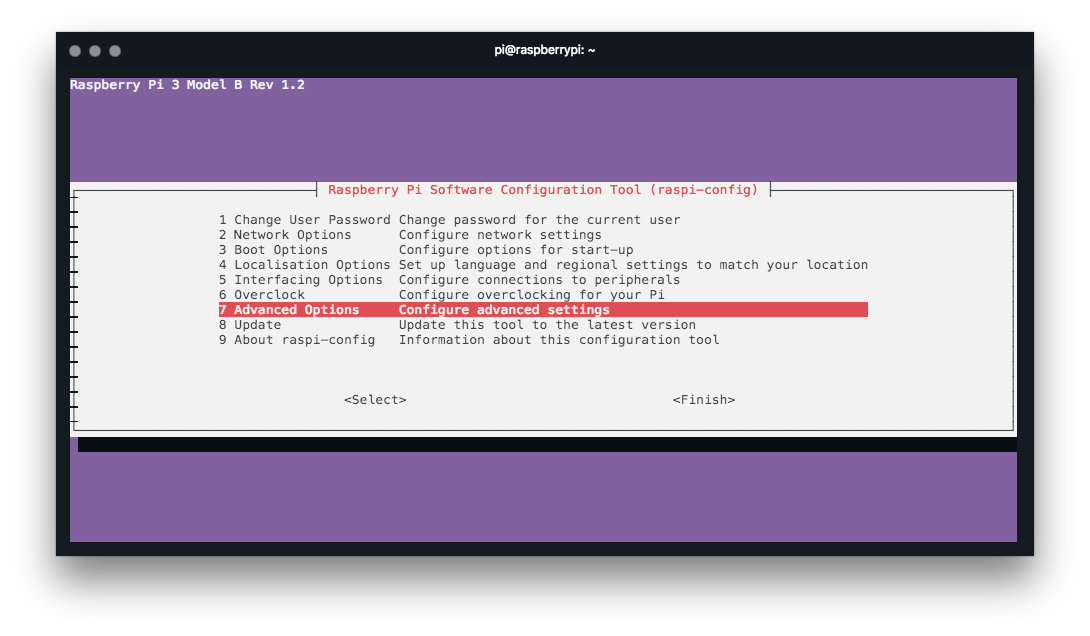
Expand partition to use all available space
When we burn an image into an SD Card, not all the disk space available in the SD Card will be recognized immediately.
To fix this we need to expand the partition.
Type $ sudo raspi-config and follow the instructions in the screenshots below. (Choices are highlighted in orange.)
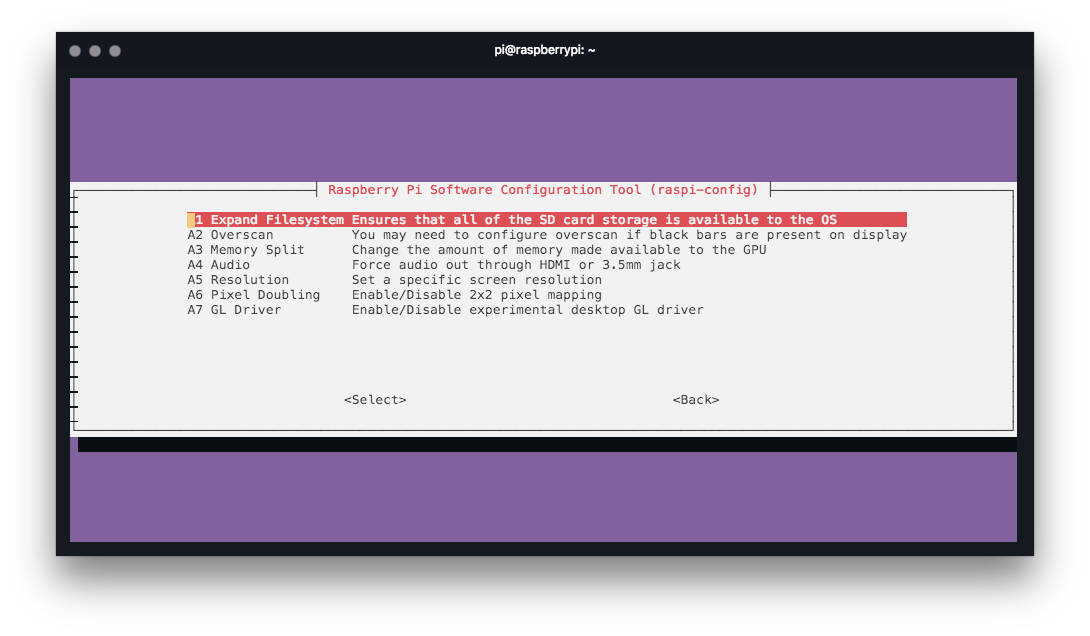
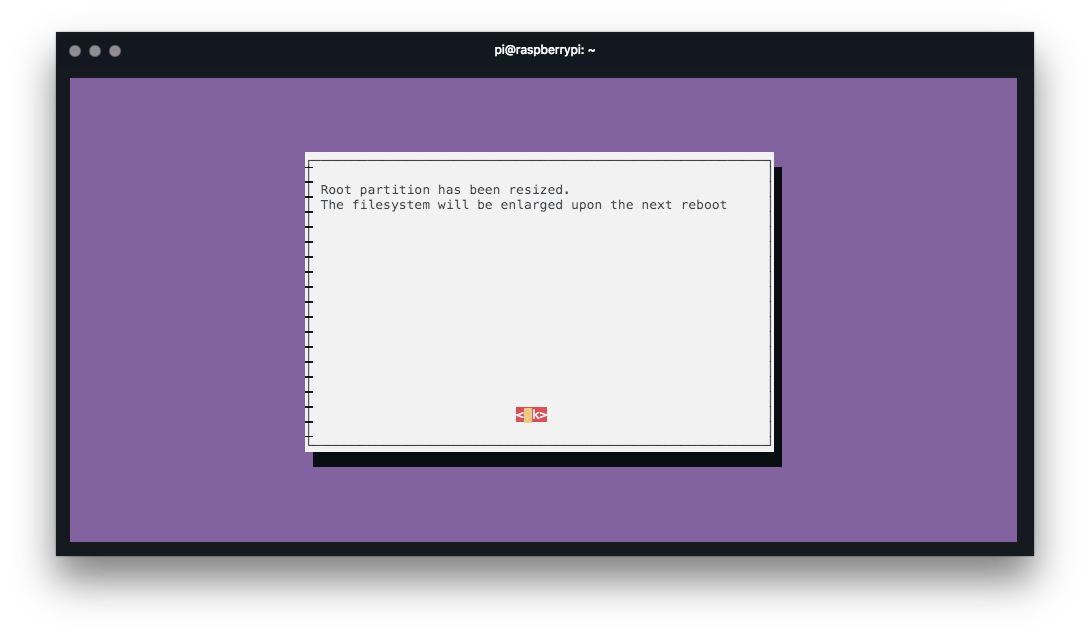
Verify the disk pace with df -h. Under /dev/root you can see the free space and disk size.
Extending Memory
We only have limited memory available and little virtual memory available. Luckily Raspian has dphys-swapfile script to deal with this easily.
To edit I like to use vim $ sudo apt install vim -y, but you can use anything you like.
Type $ sudo vim /etc/dphys-swapfile to edit the file and modify the value to expand the amount of virtual memory to 2Gb. (Or more, based on your needs.)
CONF_SWAPSIZE=2048
Save, exit and reboot.
Now that we have virtual memory, let's double check it.
Type $ free and you should see the following.

You can see the last line, with our 2Gb of swap file!
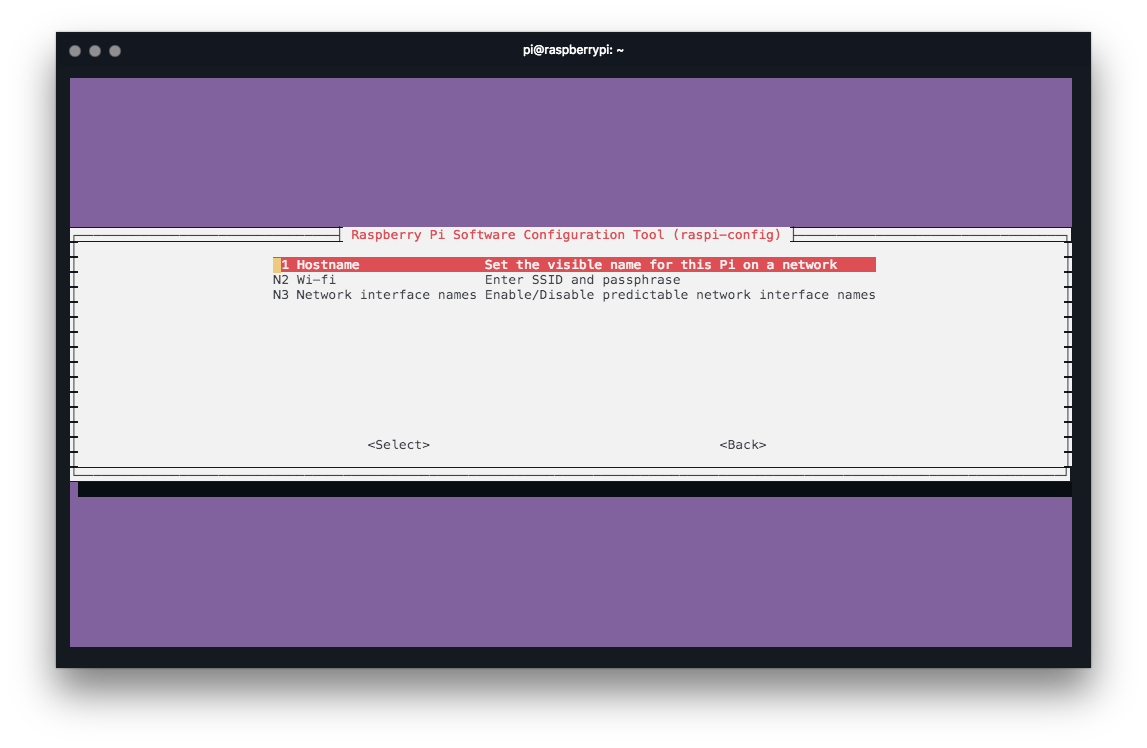
Change Default Hostname
Type $ sudo raspi-config and follow the instructions in the screenshots below. (Choices are highlighted in orange.)
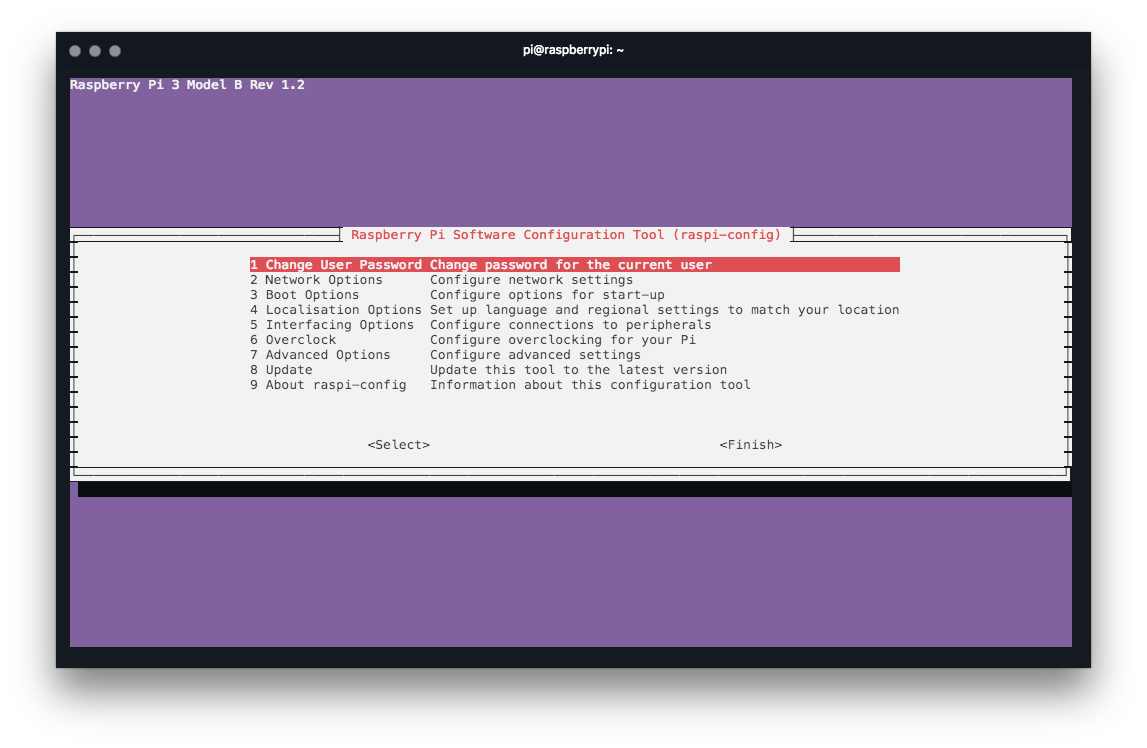
Change Default Password
Type $ sudo raspi-config and follow the instructions in the screenshots below. (Choices are highlighted in orange.)
Disallow password logins over SSH
Given enough time (or a weak password) a brute-force attacker could gain access to your Pi. We can make this much harder by disallowing SSH to accept password logins.
To do so, first, generate an ssh-key on your computer.
Run $ ssh-keygen, answer all questions. This will create a private/public key-pair in the directory you specify. On a Mac, I like to keep all of them in /users/my-user/.ssh/your-key-name.
Once the new key is created, we can use ssh-copy-id utility to copy it over to the Pi.
Type $ ssh-copy-id -i ~/.ssh/your-key-name pi@pihostname.
Now let's disable password logins over SSH. Add PasswordAuthentication no to your SSHD config file:
echo "PasswordAuthentication no" | sudo tee -a /etc/ssh/sshd_config.
To speed things up on a MAC, you can edit your ~/.ssh/config and add the following:
Host my-pi-name
HostName pihostname.local
User pi
IdentityFile ~/.ssh/your-key-name
ServerAliveInterval 60
Save. Now, to ssh in, all you have to do is $ ssh my-pi-name!
Reboot your system and check that you can still access the Pi!
Configure a Static IP Address (Optional)
It's a good idea to setup a static IP address so you always know where to find your Pi.
Add the following to /etc/dhcpcd.conf:
interface eth0
static ip_address=192.168.2.200/24
static routers=192.168.2.1
static domain_name_servers=192.168.2.1 8.8.8.8
ip_address is the static IP address you want for your Pi.
routers is the IP of the router.
domain_name_servers is the chain that you want for your DNS. The first one is the IP address of your router and the second one is the fallback Google DNS.
Screen (Optional)
Sometimes, you want to be able to run a long ssh command, be able to close the terminal, and check if the command is done at a later time. To achieve this, we will install screen.
Type $ sudo apt-get install screen.
Once this is done, you can start a screen session with $ screen bash, this will give you a long lived session.
Terminate Session: CTRL + D.
Detach Session: CTRL + A release and then press D.
List All Sessions: $ screen -list.
Reconnect Session: $ screen -r 1245.pts-0.raspberrypi.
System Update
Let's make sure you're running the latest and the greatest!
$ sudo apt-get update
$ sudo apt-get upgrade
Done!
This should give you a good starting point to build something amazing! If you have any suggestions, write me or leave a comment below and I will add it in.